The flat roofing industry has seen a number of innovations over the past decade. EPDM rubber roofing systems in particular have changed the market landscape due to the ease of installation and its reliable water-tight qualities.
Using EPDM rubber roofing can help to make flat roof installations that little bit simpler, whether you are an experienced professional or a confident DIY-er. The system is fast and easy to apply, but to ensure this is done correctly, make sure to follow PermaGroup’s handy step-by-step guide, brought to you by our roofing arm, PermaRoof UK.
What equipment do I need to install EPDM?
- EPDM rubber roofing membrane – we recommend Elevate branded products
- Broom
- Soft brush
- Angle grinder/mortar chisel
- Water-based deck adhesive
- Nine-inch roller
- Contact adhesive
- Sharp knife
- Paint brush
- Penny roller
- Masonry drill
- Mastic
- Hammer
Installation guide

Step 1 – Prepare the roof deck
Before starting anything, it is important to clear the roof deck of any dirt, dust, and debris. If you adhere the membrane to a roof that isn’t clean, you are likely to end up with a bumpy mess that won’t be an effective as possible. The adhesive used in EPDM rubber roofing will also not stick properly or evenly if the surface isn’t smooth.
Cleaning your roof need not be tricky – all you need to do is give it a good brush down with a soft household brush. It should remove enough of the dust and oil or grease spots to create the ideal surface to work with.
The product will also not adhere to wet surfaces so ensure the area is dry – trapped moisture could vapourise and impact how well the membrane works. This is why it is also worth picking a few clear, dry days to carry out this project without interruption.
Step 2 – Install drip batten and drip back trim
At this stage, you should also install the drip batten and drip back trim along the roof’s edge to allow for effective rainwater drainage. This will extend the roof deck so that water run off drips into the gutter rather than behind the gutter. The drip trim has a front and back piece – using nails, install the drip trim backplate and align the curved top edge of the trim with the timber batten.
Step 3 – Rolling out and resting
Now it is time to unfold and lay the EPDM rubber over the roof surface. Remember, the EPDM membrane should cover the roof completely with an additional thick overhang for the adjacent walls and roof edge. An EPDM membrane will have sat in a particular position for some time during packing and delivery, which means it isn’t quite ready to install straightaway.
Once you have it unfolded and laid out, let it rest for around 30 minutes before you begin the installation process to allow for any creases to relax. In cold weather, this waiting time will be slightly longer. By allowing this phase of rest, the EPDM will install smoothly with no wrinkles.
Step 4 – Apply adhesive
Once you are satisfied the membrane has relaxed, you can now begin to apply adhesive for the installation. Pull back half the membrane to the centre point and expose the deck, and then begin applying the water-based deck adhesive using a nine-inch paint roller. Make sure the glue is spread evenly and there are no visible lumps. Leave a 150mm wide perimeter free from adhesive as these edges require a slightly different contact adhesive later on.
It is important to then roll back the EPDM into position immediately while the adhesive is still wet to secure it.
If the adhesive dries out (becomes opaque) before the membrane is laid back down, then a thin coat can be applied to the back of the membrane and allowed to dry before installing. In hot weather, applying adhesive to smaller areas will help to avoid premature drying.
[Water-based adhesives should only be used when the outside temperature is four degrees and rising and there is no chance of freezing conditions in the following 24-48 hours].
After refolding, use a broom to sweep across the EPDM rubber roofing system. This will remove any trapped air and help to create a smooth and secure bond.
Step 5 – Repeat process on opposite side
Once you’ve completed one side, roll back the opposite side to the centre point and repeat the adhesive rolling and laying process. Be careful not to get any adhesive on the upward-facing surface of the rubber, if you do, wipe off before it dries.
If you still notice any creases or unsightly folds in the membrane, put some weight down on those areas to promote bonding and create a professional finish.
Step 6 – Apply contact adhesive
Fold back the un-adhered EPDM on the 150mm perimeter section and using the smaller paint roller, Apply a thin coat of contact adhesive and any vertical upstands. Also apply the contact adhesive to the back of the rubber membrane. The contact adhesive creates a faster, stronger, more permanent bond that will prevent uplift and water infiltration.
Before re-folding, the contact adhesive should be touch-dry on the surface with no puddles of glue. Trim excess EPDM membrane from the walls and upstands after application.
Step 7 – Finish the edges
Before installing edge trims, fold the EPDM membrane by pinching to form a ‘pigs ear’, then fold onto the side of the roof. Position and install the trim corner, then secure the plastic trim kerb edge, cutting to the appropriate length. Use joint clips to secure.
Cut away any excess flaps of EDPM, leaving an overhang that is just a little shorter than the PVC trim that you’re going to nail on and finish off the edges of your roof.
You may also be creating a gutter system consisting of timber battens and trim that will allow the water to flow off the roof and into the gutter – this will be a similar process to installing the PVC edge trims.
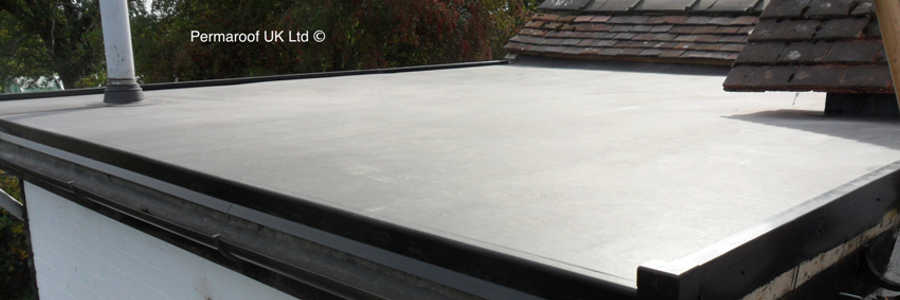
Step 8 – Finished!
And now you are finished! Your new EPDM rubber roofing is installed and can last for up to 50 years with proper care.
EPDM facts
What is EPDM? EPDM is a 100% cured, single-ply roofing membrane made of a synthetic rubber ethylene-propylene-diene terpolymer. It’s a long-lasting, simple to install and low maintenance solution that provides a reliable waterproofing system for any type of flat roof – domestic or commercial.
How long does EPDM last? Well maintained EPDM rubber has the potential life expectancy of 40-50 years.
How eco-friendly is EPDM? The membrane has a low carbon footprint – making it an environmentally friendly alternative to traditional roofing systems. Elevate RubberCover, in particular, has been recommended by environmental organisation Greenpeace and will contribute towards a BREEAM A+ rating.
EPDM quick benefits
- EPDM is a versatile material that can be used on a variety of residential projects, such as extensions, terraces, sheds and gutters
- It can also be used to repair metal roofs, as well as being suitable for extensive green roofs
- EPDM is a great option for projects that are working to tight timescales due to the membrane being easy to install
- The product comes in large, seamless sheets up to 15.24m in width and 61m long for faster coverage
- No specialist tools, heat or flames are required during installation – meaning less time on site
Share This Story
Get in Touch
PermaGroup welcome enquiries from the trade, stockists and homeowners alike. Contact us today using the below form and one of our experienced team members will be on hand to help you right away.
Permaroof UK® Ltd
Unit 1
Westway
Cotes Park Industrial Estate
Alfreton
Derbyshire DE55 4QJ
Tel: 01773 608 839
Fax: 01773 608 408
Email: Click here
Registration No. 4109502
VAT No. 764 2785 00
Permaroof (UK) LTD
Opening Hours
Mon – Fri (8am / 5pm)
We are closed on bank holidays and we re-open the following working day at 8am. Feel free to send us your enquiry during these periods and we can get back to you.
CONTACT PERMAGROUP
PermaGroup welcome enquiries from the trade, stockists and homeowners alike. Contact us today using the below form and one of our experienced team members will be on hand to help you right away.
Permaroof UK® Ltd
Unit 1
Westway
Cotes Park Industrial Estate
Alfreton
Derbyshire DE55 4QJ
Tel: 01773 608 839
Fax: 01773 608 408
Email: Click here
Registration No. 4109502
VAT No. 764 2785 00
Permaroof (UK) LTD
PermaGroup Brands, Partners and Clients
PermaGroup has established links with some of the biggest names in our industry thanks to our reputation of excellence. Contact us to find out more about becoming a supplier or stockist of any of our products range.